Showing posts with label cooking. Show all posts

Monday, March 16, 2015

Purple Mashed Potatoes + My Cooking Challenge


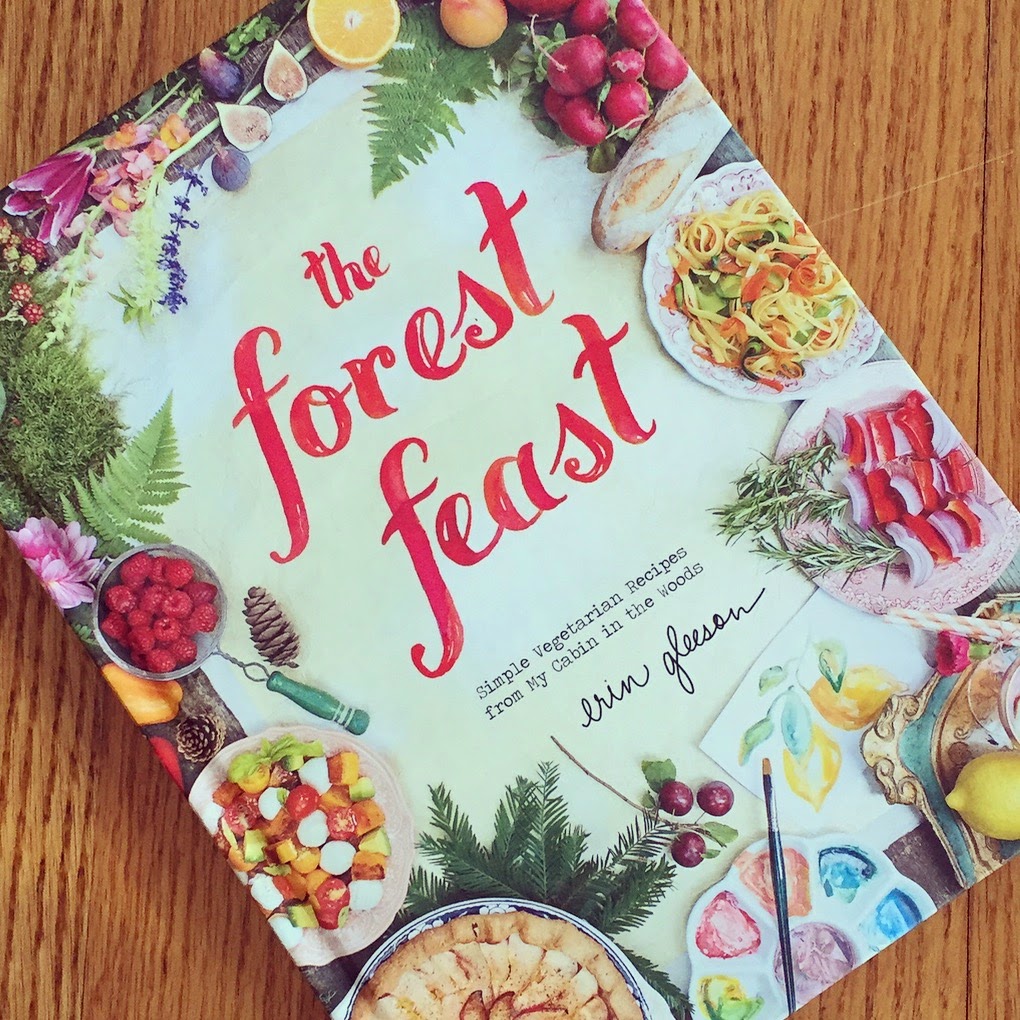
Cooking has never come naturally to me. Cooking to me can sometimes seem intimidating and overwhelming so I typically will stick with making things I know and can't mess up like pasta or my lunch go to of turkey bacon and eggs with tortillas. I want to start being a little more adventurous with my cooking skills and learn to be more confident with the dishes I serve. So I have decided to try cooking every dish in The Forest Feast by Erin Gleason. Consider her my Julia Child...


My boyfriend gave me her book for Christmas and I have made just one thing so far (Rosemary Roasted Nuts) and it came out really well, I think! As I am deathly allergic to nuts, I left him to be the judge! The book is AMAZING! It is so colorful and beautifully photographed, I could look at it every day. The book has great fresh recipes that are simple to make and great for someone that is trying to develop their cooking abilities. So here goes my attempt at cooking...


:INGREDIENTS:
6 purple potatoes*
1/2 C greek yogurt 
2 TBSP olive oil
1/2 tspn garlic powder
salt and pepper

* I couldn't find regular sized purple potatoes and as I was leaving Mariano's I found a display with a variety of fingerling potatoes. So I stood there rummaging through the basket and picking out just the purple ones. Just a tip incase you can't find larger ones!


:RECIPE:
1. Boil 6 purple potatoes for 15-20 minutes(until tender).
2. Peel the potatoes. 
3. Combine in a bowl with the rest of the ingredients and mash until smooth.
4. Garnish with greek yogurt and chopped scallions and ENJOY! 

The recipe was incredibly easy to follow an they came out beautifully! 

Friday, March 6, 2015

Focaccia + My Pursuit of Being a Baker


I am always looking to challenge myself a little bit and I finally decided to tackle focaccia bread! I'll admit throughout the process I was met with bouts of anxiety… will the dough rise?  Did I let the yeast bubble enough? My friend Colleen was over and asked if she had to help me, I said no but that it would turn into The Little Red Hen story that I used to read as a kid. I would put in all the work and she would want a piece of bread at the end but she didn't help out! So the bread making adventure began...


I felt inspired to make focaccia because my boyfriend's dad will make it all the time and he makes it seem effortless. I thought it was going to be 1,2,3 and I'd be shoveling focaccia into my mouth… apparently there is a lot of waiting time during the process to let the yeast do its job. 

:INGREDIENTS:
1 package dry yeast
1 cup warm water
1 tsp honey
2 1/2 cups all purpose flour
2 tsp kosher salt
1/2 cup + 1 TBSP extra virgin olive oil
1/2 onion, thinly sliced
10-12 cherry tomatoes, thinly sliced
1/4 cup grated parmesan cheese


:DIRECTIONS:

1. In medium bowl, stir together the yeast, honey and warm water. Let it rest until bubbles form at the top. (About 10 mins)

2. Stir in the flour, 1/4 cup olive oil and 1 tsp of salt. Once it is well mixed. Knead it on a floured surface until smooth. (About 5-10 mins)

3. Place the dough in a lightly oiled bowl and wrap it in plastic wrap and let it sit there for about an hour. 

4. While you anxiously wait for it to rise you can chop 1/2 an onion and toss them into a skillet with a TBSP of olive oil and let them cook for about 20 minutes until they are caramelized. Stir it occasionally. 

5. Preheat the oven to 450 degrees.

6. Remove the dough from the bowl and press it into a cast iron skillet. Then with your CLEAN finger press light little holes into the dough and let it sit there for about 15 minutes. Then drizzle the dough with 2 TBSP olive oil.

7. Slice the tomatoes thinly then sprinkle them over the dough. Then add the onions, salt and parmesan to the top and toss it into the oven for about 20 minutes!!

8. Get ready to enter a carb coma!


Wednesday, February 18, 2015

Homemade Protein Bars + Baking With My Kryptonite


I've been on the hunt for a great protein bar recipe for weeks months now. Now in full disclosure I am probably risking my life to make these bars because I am HIGHLY allergic to peanuts, almonds, all that stuff. So why am I making these bars you might ask? My boyfriend eats granola bars every morning for breakfast and there isn't much protein in them so I thought I could probably pretty easily make a protein bar that tastes better than your run of the mill chocolatey protein bar.

I love this recipe because it has all natural ingredients, no preservatives and I can pronounce everything that's put in the bar!


During this entire process I tried my best to not actually touch any of the ingredients, but I had my Epi pen on hand just in case...


:INGREDIENTS:
1 1/2 cups rolled oats aka Old Fashioned Oats
1 cup whole almonds
1/2 cup dried cranberries*
1/2 cup dried apricots*
1/2 cup pistachios
1/3 cup walnuts
1/3 cup sunflower seeds
2/3 cup cashews

1/3 cup pure maple syrup or honey
1/4 cup apple sauce
1 cup (8 oz.) almond butter

*You can substitute the fruits for any dried fruit. I've made them before with blueberries and cherries. 


My almond butter kryptonite…

:DIRECTIONS:
1. Combine all of the dry ingredients into a large bowl and set aside. 
2. Measure out the almond butter into a microwave safe bowl and put in the microwave for 2 sessions of 18 seconds.
3. Combine the syrup and apple sauce into the bowl with the almond butter and whisk until smooth. 
4.Combine the almond butter mix with the dry mix and mix well.
5. Line an 8x8 baking pan with wax paper then pour the mix into the pan and spread it out evenly.
6. Place in the freezer for at least an hour, hour and a half if you have the time. 


7. Once they've sat in the freezer take it out and lift out the one solid bar by grabbing the wax paper and setting it down on the counter.
8. Use a knife (I used a butcher knife, a little extreme but it got the job done!) to cut the bar into how ever many pieces you like. It can make anywhere between 10-16 bars. 


Wednesday, February 11, 2015

Baking and Bunting: Lemon Buttercream Vanilla Cake


Full disclosure: The final cake that I made was my second attempt because the first one went way wrong. I had originally envisioned a beautiful fluffy vanilla cake made from scratch… what I got was a buttery blob whose taste couldn’t even be masked by my yummy lemon buttercream frosting. In the oven it smelled like someone had just microwaved popcorn and sure enough when I sampled it it tasted like a movie theater. So it was back to square one!


Baking for me can sometimes feel like a temperamental science experiment. Are you letting it cook too long? Did you add too much baking soda? Will it be too dry? Questions like that loom over me when I’m baking in the kitchen. I’m still fairly new to the the cooking/ baking game so of course there is still a lot I’m learning and making mistakes is just a part of it!


:RECIPE:
1 1/4 cups sifted flour
1 1/2 cup sifted cake flour
1/2 tsp baking soda
1 1/2 tsp baking powder
1 tsp salt
1 1/2 cup sugar

2/3 cup vegetable oil
1/3 cup vegetable shortening
3 TBSP vanilla extract
3 eggs
1 1/2 cup buttermilk

:DIRECTIONS:
1. Sift together all the dry ingredients
(flours, baking soda/powder, sugar and salt)
2. Spray 2 nine inch round cake pans with baking spray.
3. In an electric mixing bowl beat together the vegetable oil, shortening and vanilla. Using the whisk attachment beat the mix until light and fluffy. 
4. Beat the eggs in one at a time. 
5. Fold in the dry ingredients alternating between mixing in the buttermilk and the dry ingredients. 
6. Bake at 325F for 25-30 minutes. Then let cool before assembling with the frosting. 

:FROSTING:
1 C. butter (softened)
8 oz. cream cheese
Zest of 2 lemons
1 TBSP lemon juice
3 1/2 - 4 1/2 C. powdered sugar


1. Beat butter, cream cheese and lemon zest.
2.Stir in lemon juice.
3. Gradually add the powdered sugar until it has reached a desired texture.

*After you've mixed the buttercream, let it sit in the fridge for 20-30 minutes to let it harden so its easier to frost. 

Then frost it and ENJOY!

If you want to learn how to make the bunting… keep reading!


I've always had an obsession with bunting and I'll find any excuse to make it! I've never made it on this small of a scale before but it was super easy. All you need is paint chips, scissors, string, glue gun and kebab sticks. It might seem strange to have a supply of paint chips on hand but I'm a girl that likes to DIY and I find a ton of uses for them!

1. Cut out 6-7 triangles.
2. Put a dot of hot glue on the back of the triangles and start attaching them to the string.
3. Double knot the string around the kebab sticks and you've got yourself a decorative cake piece!


Tuesday, February 10, 2015

Mint Green Giant…Smoothie


I will be the first to admit that I probably do not eat as many vegetables as I should. Now I know how this looks, there are chocolate chips in there but I wanted to make a sweeter breakfast smoothie and WHY NOT?! It has soy milk which I love and greek yogurt which I could eat by the barrel. 


The final result was a yummy mint green smoothie that was quick to make and smelled like summer!

RECIPE…

3/4 cup greek yogurt
1/4 cup fresh mint
1 cup soymilk
1/4 cup dark chocolate chips
1 cup baby spinach
1 TBSP maple syrup
1 1/2 cup crushed ice


Wednesday, January 7, 2015

Baked Garlic Nuts + Living on the Edge with My Nut Allergy


I would never say I'm naturally gifted at cooking but I like to try and I don't even mind when I make mistakes. I was gifted this book The Forest Feast for christmas and I absolutely love it. It's a vegetarian book and while I do now eat poultry and fish, I haven't eaten red meat since 2005, except for a small slip up of a cube of bbq pork in Hong Kong and that was so that I wouldn't appear rude! The author created these incredible recipes and even more beautiful photos that fill every page with color and amazing composition.


My first attempt from The Forest Feast is the Baked Garlic Nuts. I should also point out that I am deathly allergic to nuts but I wanted to try the recipe out for my boyfriend who loves them so I kept my epi pen nearby just incase a freak accident occurred, which would happen to me seeing as I took a nasty fall two days ago and sent my phone slow motion flying through the air. I saw hit the ground hard and I still had time to look up and watch my phone doing summersaults and finally bounce a few times before landing under a car. We both survived though. 


I've NEVER seen or peeled this much garlic in my entire life, I thought the 20 garlic cloves might have been a misprint but that's what the recipe called for. However I will say you could easily get away with half and it would still taste just as delicious and leave you with half the potent breath!


RECIPE

20 peeled cloves of garlic *
1 T finely chopped fresh rosemary
2 t olive oil
1/4 t truffle salt**

1 cup unsalted raw mixed nuts 


First: Mix and roast the everything BUT the nuts on a baking sheet at 350 degrees for 15 minutes or until garlic is soft and golden.

Second: Mix the nuts into the garlic mixture on the baking sheet and roast another 5-7 minutes. Then transfer to a bowl and add kosher salt to taste!

* Like I said before 20 cloves is a little intense so I would do maybe 10, but hey if you love garlic then go crazy!

** I didn't have truffle salt nor did I find it at the supermarket so I used regular kosher salt.


Then thats it and your kitchen smells super delicious afterwards! This is a super easy snack to make for everyday life or dinner parties, or if your like me a "lethal" snack to make and handle for your boyfriend. So if your allergic like me and like to live on the edge try making this great snack. Thank you Erin Gleason for this BEAUTIFUL book!